

|
| Hydraulic Calipers |
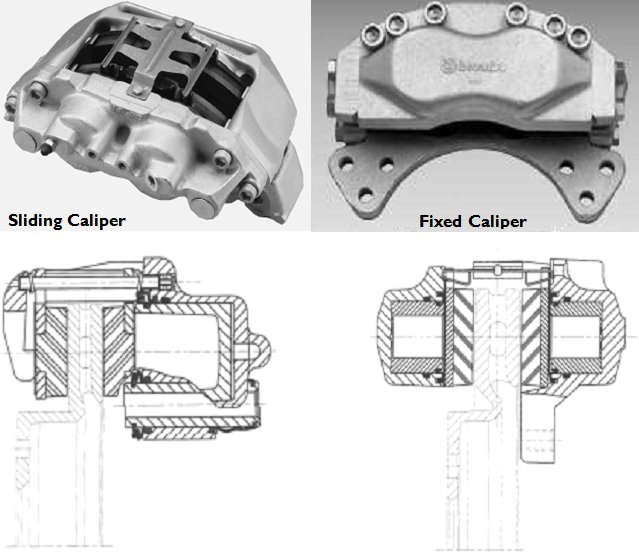
Hydraulic calipers come in two basic types, sliding or fixed. Fixed calipers have one or more pistons on each side of the disc which each apply an equal force to the disc. Sliding calipers have pistons on one side of the disc only and rely on Newton’s Third Law to allow an equal reaction on the back of the disc by letting the whole housing slide on one or more guide pins. Ignoring frictional effects both types will produce similar amounts of total clamp force. The benefits of fixed calipers are predominantly better efficiency and improved environmental durability. Sliding calipers on the other hand offer packaging benefits and are the only way to add an integral parking brake function.
There are then a whole load of detail differences, number of pistons, mounting method etc. Some of these offer technical benefits, some packaging and some manufacturing. Of course they are then corrupted by cost benefits and ‘salesman speak’ so you have to be sure of the real advantages and choose a caliper accordingly.
What’s the benefit of the latest radial mount calipers fitted to motorcycles?
Maybe there are some real advantages but we suspect it’s not really performance.
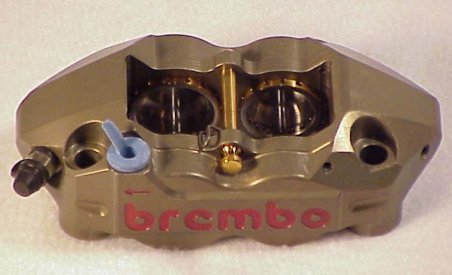
Multi Piston Calipers
Calipers may have more than one piston on each side of the disc,
the main benefit of a multi piston brake is increased effective diameter, since
two smaller diameter pistons allow a narrower pad to be used, which for a given
disc means the torque radius is increased.
Multi piston brakes may reduce the instances of longitudinal taper wear of the
pad since the pad is supported over more of its length. Some manufacturers offset
the pistons or use a slightly larger bore at the trailing end of the pad to
positively bias the pad wear, however this will make the brakes handed L/R.
On the downside a narrower pad has a smaller swept width and cannot transfer
heat into the disc as effectively.
Pad Size
The pad area should be chosen by the caliper manufacturer to
give the correct surface pressure for the given working pressure. A thinner,
longer pad will increase the effective braking radius and thus torque, (hence
multi piston calipers). On the other hand the heat energy is transferred to
the disc by the swept width so a longer thinner pad could run hotter.
Beware that pad wear is very duty cycle and driver dependent. For typical road
driving most pad wear occurs under the high number of ‘normal’ stops
rather than the three of four annual emergency stops so if the line pressure
is increased for a normal stop because the vehicle weight is increased or the
gearbox doesn’t produce engine braking (auto) or the ‘normal’
driver has a bigger boot, then temperature and thus wear will increase significantly.
A new duty cycle must be thoroughly investigated, a minibus manufacturer went
bankrupt partly because they failed to appreciate the rapid acceleration and
braking of a bus used in town, a pad life of two weeks wasn’t acceptable!
Fitting a bigger engine, of the same weight, to your road car does not require
you to up-rate the brakes. It’s the stopping from higher speeds and the
corresponding increase in energy that may require dealing with. (Since all legislation
testing is at fixed speeds then engine power is not relevant).
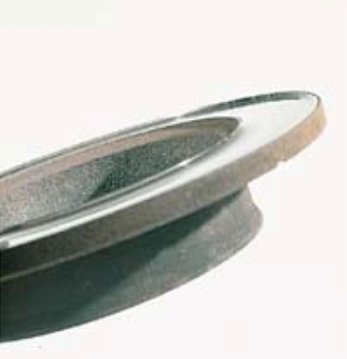
Disc Requirements
The disc diameter and thickness need to be matched to the caliper
design. Incorrect diameters could cause pad wear problems or prevent the pads
being removed when the disc is worn.
Minimum disc thickness must be adhered to since a worn disc and pads could cause
the pads to disengage from the abutments. For a fixed caliper the wear limit
much be referenced to the caliper mounting to prevent skimming all the material
from one side of the disc.
Swept Profile
The clearance between the caliper and the wheel must be considered. This should be based on the smallest wheel that could be fitted, don’t forget the spare wheel!
Front tyre changing procedure for a 98 model Honda Accord Type R
Jack up the rear of the car and remove one of the 17” rear
wheels.
Fit the 16” temporary spare wheel.
Jack up the front of the car, remove the punctured 17” tyre.
Fit the rear tyre to the front and put the punctured tyre in the boot….
Well it works but it isn’t ideal is it?
A couple of other things to consider are if the tyre valve passes over the caliper, as on many trucks, then it ought to be protected as a trapped stone will bend or break it and a tightly fitted brake disc will have an extreme effect on tyre life if they cause the tyre bead to overheat.
Caliper mounting location
There are a host of arguments for locating the caliper around
the disc they’re all overridden by the basic packaging constraints though.
Firstly is the asbility to bleed the brake.
In order to get the air out of a caliper the bleed nipple has to be at the highest
point, obvious eh? Not to a few manufacturers it isn’t. If it isn’t
then the caliper must be removed and rotated around during bleeding.
During cornering the disc will deflect due to the stiffness of the swivel. This
causes the disc to push back the pads further than desirable. If the brake actuation
is from a master cylinder this could cause long pedal travel and delayed application
time. In order to minimise this effect brake calipers should be positioned on
the neutral axis of bending ie vertical. Whether it’s in front of the
axle or behind will depend on your priorities and packaging! During braking
the clamp load produces a couple with is reacted by the wheel bearing. Braking
also causes significant weight transfer to the front of the machine. Mounting
the caliper behind the axle, 3 o’clock position on the front left will
help to reduce the bearing load under braking but…
When the brakes are off the pads will usually fall to the lower abutment under
gravity, if a caliper is mounted behind the axle then this abutment is not the
loaded one for forward direction braking. Every time the brakes are applied
the pads will move through the clearance and knock the loaded abutment. Pad
noise is a cause of driver annoyance so mounting the caliper in front of the
wheel, 9 o’clock position on the front left could be a better bet.
If the pad gap is too wide this will also reduce side loads on the piston.
© Engineering Inspiration